Using a DSLR, Mirrorless Camera, GoPro or Professional Camcorder
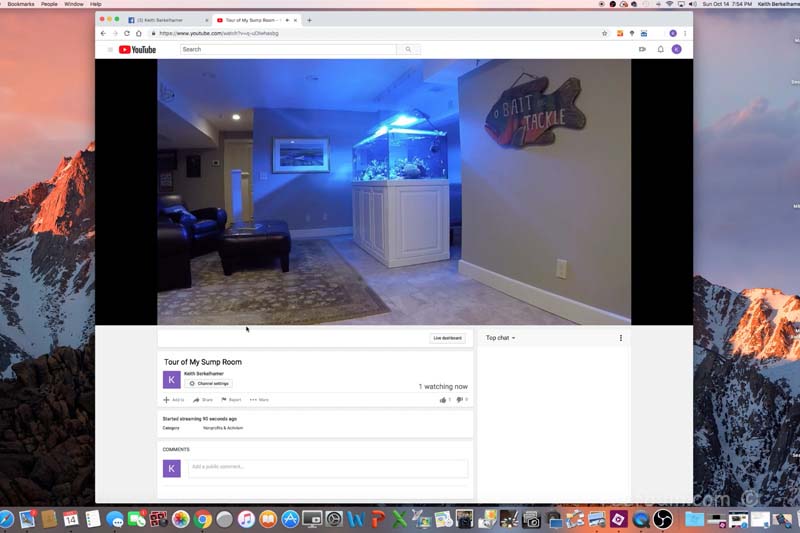
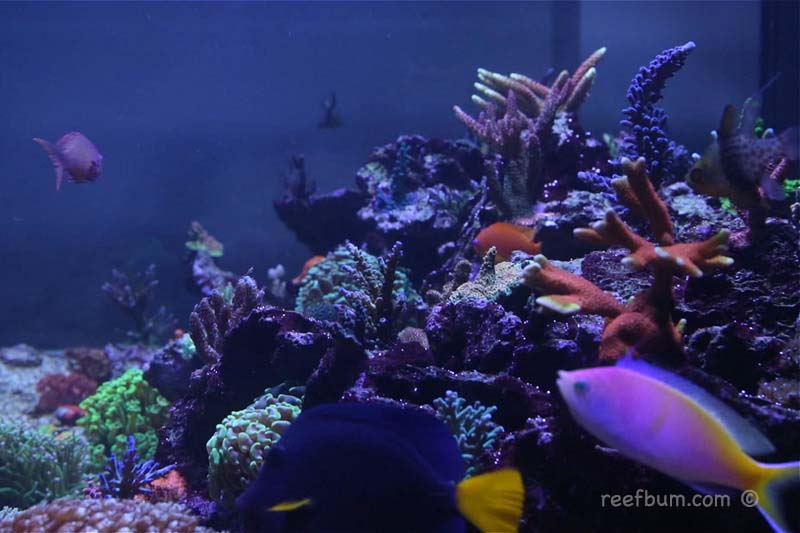
I have a 187 gallon reef aquarium and every now and then I like to share it in real time using either Facebook Live or YouTube. The first time I tried this I used my smartphone and it fell way short in representing the true colors and vibrancy of the tank. My tank, like most reef tanks, has a lot of blue light and my phone didn\’t have a way to adjust the white balance to capture the authentic colors. And then there is audio. In many instances, you will not want to rely on a phone to capture audio when live streaming.
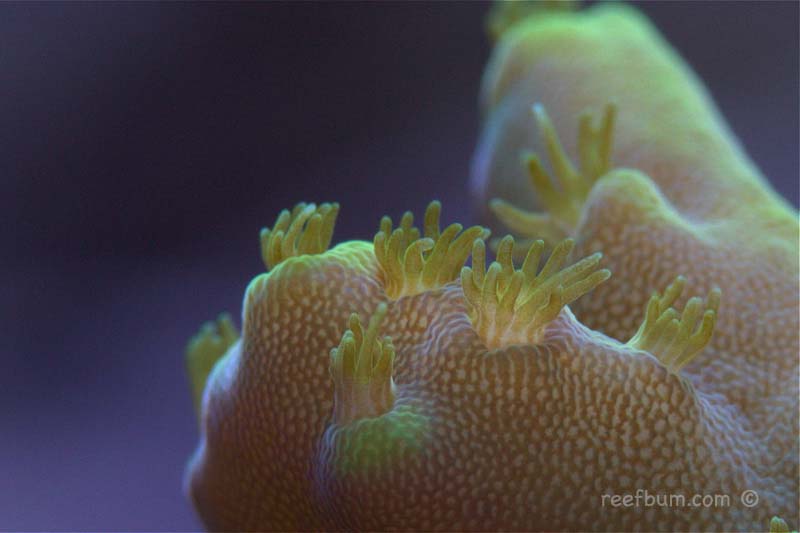
Motivated to find a better solution, I did a lot of research and came up with a way to live stream using my DSLR. The DSLR had the necessary white balance controls and it also gave me the option to capture other perspectives using different lenses. For instance, I love the up-close detail you get with a macro lens and to be able to stream this live is just cool!
Time to Upgrade Camera For Live Streaming
My DSLR, a Canon 5D Mark III, did a great job for the three and a half years I had it but it was time for an upgrade. I sold my Canon and purchased a Sony a7 III Full-Frame Mirrorless Camera. Why did I do this? Generally, mirrorless cameras are better for video versus DSLRs so I performed some due diligence and settled on the Sony since it had a reputation for producing stunning 4K video! Of course it would be nearly impossible to stream in 4K but I wanted to step things up for the videos I edit and produce for my YouTube channel.
There are also times when I like to live stream using a GoPro since I can attach it to a chest harness and free up my hands, allowing me to easily do live demonstrations from my viewpoint.
The equipment needed to produce live video and the steps for streaming are very similar for a DSLR, mirrorless camera, GoPro and even a professional camcorder such as a Sony HXR-NX80.
Equipment List For Live Streaming
- Computer or laptop – You will not be able to effectively stream video if you don\’t have a computer or laptop with enough giddyup. Check with the manufacturer to make sure you have a powerful enough processor, sufficient RAM and a good graphics card. I can stream really well using my iMac but I when I tried using my wife\’s MacBook the stream was terrible.
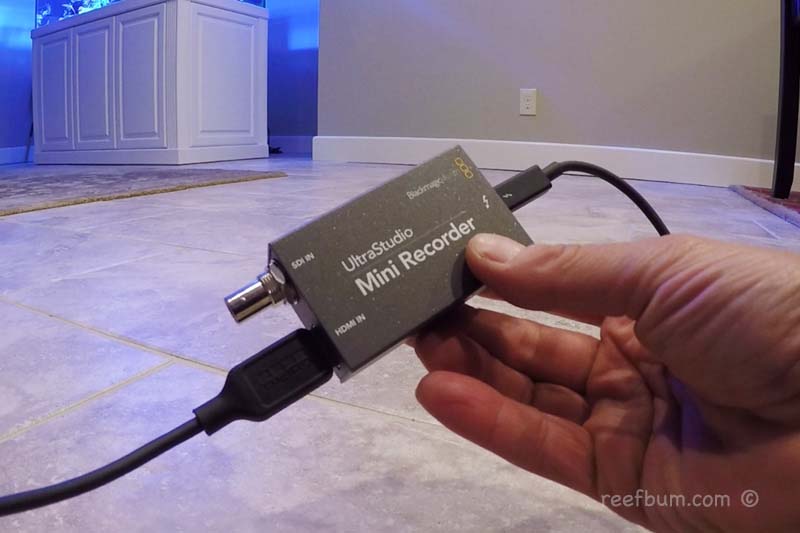
- Blackmagic Design UltraStudio Mini Recorder – Thunderbolt – You will need to set this device up on your computer or laptop. This is a good tutorial video on how to do so.
- 3m Thunderbolt Cable
- Apple MMEL2AM/A, Thunderbolt 3 (USB-C) to 2 Adapter – You will need this if you have a newer Mac with a Thunderbolt 3 port. Some Windows PCs and laptops have Thunderbolt 3 ports as well.
- HDMI Cable
- Mini-HDMI to HDMI Cable
- Professional camcorders – not needed
- DSLRs/mirrorless cameras – The Mini-HDMI to HDMI cable should come with the camera, although they are pretty short. I picked up this longer one to further extend the reach of my camera.
- GoPro – GoPro Micro HDMI Cable
Audio
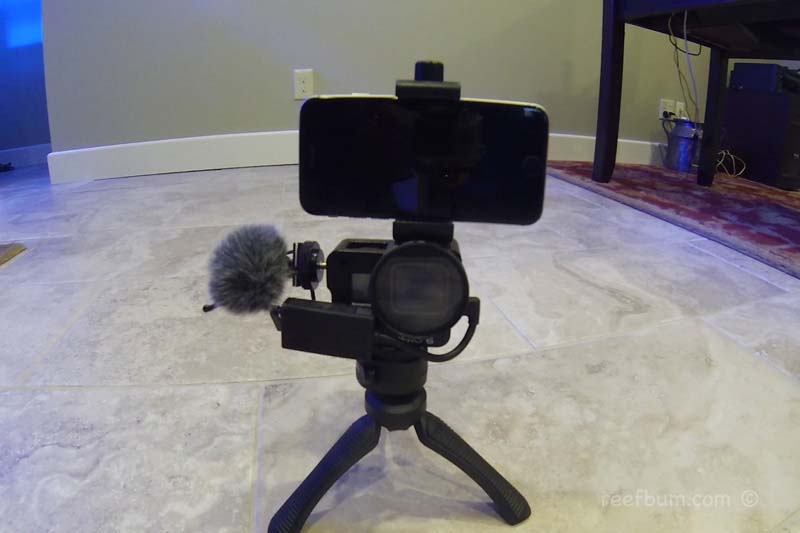
As for audio, I highly recommend purchasing an external microphone for your DSLR or mirrorless camera such as this one sold by Rode. Professional camcorders have good external microphones but if the subjects are more then 6 feet away use a wireless lavalier microphone system. This system would also be the optimal way to go for a DSLR or mirrorless camera if your subjects are not close to the camera. The internal microphones on GoPros, quite frankly, stink. To upgrade my GoPro\’s audio, I picked up an external microphone as well as a few other accessories. The setup works great.
Equipment for GoPro Audio Upgrade
- GoPro Aluminum Case
- Seadream 2PACK 6 inch 3-Pole Audio Cable
- Adjustable Cable Clips
- Quick Release Thumb Screw
- Saramonic SR-XM1 3.5mm Microphone
- GoPro Pro 3.5mm Mic Adapter
- 3M Dual Lock Reclosable Fastener
- EDUTIGE Fur Windscreen
- Ulanzi Phone Tripod Mount Adapter
- GoPro Shorty Mini Extension Pole Tripod
You can check out this video on how to put all of the pieces together.
Connecting Camera to Cables and Streaming Equipment
- Connect one end of the Thunderbolt cable to the Thunderbolt port on the Blackmagic Design UltraStudio Mini Recorder.
- Connect the other end of the Thunderbolt cable to the Thunderbolt port on your computer or laptop. As previously mentioned, if you have a newer Mac with a Thunderbolt 3 port then you will need to use the Thunderbolt 3 to 2 Adapter. Use this as well for Windows PCs and laptops with Thunderbolt 3 ports.
- For a DSLR, mirrorless camera or GoPro, insert the male end of the male/female HDMI cable into the HDMI port on the Blackmagic Design UltraStudio Mini Recorder. If you are using a professional camcorder insert one end of the standard male/male HDMI cable into the Mini Recorder and the other end into the HDMI port on the camcorder.
- For a DSLR, mirrorless camera or GoPro, take the appropriate Mini-HDMI to HDMI Cable and insert the male HDMI end into the female end of the HDMI cable coming out of the Mini Recorder. Finally, insert the Mini-HDMI connector into the Mini-HDMI port on the camera.
Software For Live Streaming
Now let’s talk streaming software. I use a free solution call Open Broadcaster Software or OBS. Another way to go is Wirecast, which costs $700 and has many cool features not available in OBS, including the ability to live stream simultaneously to both Facebook and YouTube. If you want a professional streaming solution then use Wirecast.
Before opening up OBS, let’s cover the bandwidth needed for live streaming. Step one is to test the upload speed at the location you are streaming from. You can do so by visiting speedtest.net and clicking on the “Go” button. I recommend having a minimum of 20 mbps upload speed for live streaming. I also recommend being hard-wired to the internet at both private and public locations versus using WiFi. A 300 foot ethernet cable is relatively inexpensive.
If WiFi is your only option, do it on a password protected network, especially in a public place. Bandwidth can be consumed quickly on a non-password protected network by others browsing the internet on their phones.
A lower video resolution will also provide more cushion in terms of bandwidth and my preference is to always stream at 720p vs. 1080p. I usually set my stream settings to 720p at 30 fps for YouTube and Facebook but sometimes I do go with 720p at 60 fps. 720p is still High Definition (HD) and I have found the quality to be pretty darn good.
Test, test, test…and then Test Again!
One other very important thing…..BEFORE LAUNCHING A LIVE STREAM ON YOUR FACEBOOK PAGE OR YOUTUBE CHANNEL, TEST IT ON A FAKE FACEBOOK PAGE OR YOUTUBE CHANNEL. I personally have set up test accounts on both Facebook and YouTube to test my streams to make sure there is enough bandwidth and no buffering. After starting the stream, you can monitor its health in OBS. More one that in a bit. Did I mention how important it is to test 🙂 Ok, let’s move on to the next steps.
If your camera is already connected to the Mini Recorder and computer/laptop, then disconnect it to change the video resolution coming out of the camera. For demonstration purposes, let’s set this to 720p at 60 fps. There is one more thing you will need to do for a GoPro. While it is disconnected from the Mini Recorder, go into preferences and scroll down to “HDMI Output” and set it to “Live”. Once everything has been set, reconnect your camera to the Mini Recorder, which should be connected to either your computer or laptop. Turn the camera on and launch OBS. If you are using a DSLR or mirrorless camera, make sure it is in video mode.
Setting Up OBS
- Within OBS go to the “Scenes” menu at the bottom on the left and hit the “+” sign. Give the scene a name.
- Under “Sources” at the bottom click on “+” and select “Video Capture Device”.
- Select “Create New” and give it a name. I labeled mine Cam Link. Make sure “Make source visible” is checked.
- A “Properties for Cam Link” window will open up. Select “Cam Link 4K” in the “Device” drop-down menu.
- Check the “Use Preset” box and select 1280×720.
- Under “Controls” in the bottom right corner click on “Settings”.
- Use all of the defaults in the “General” tab.
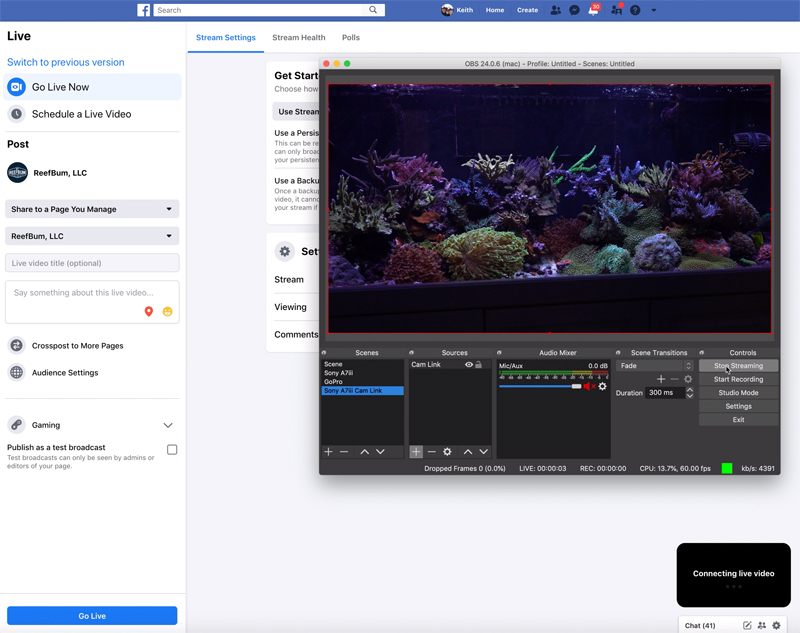
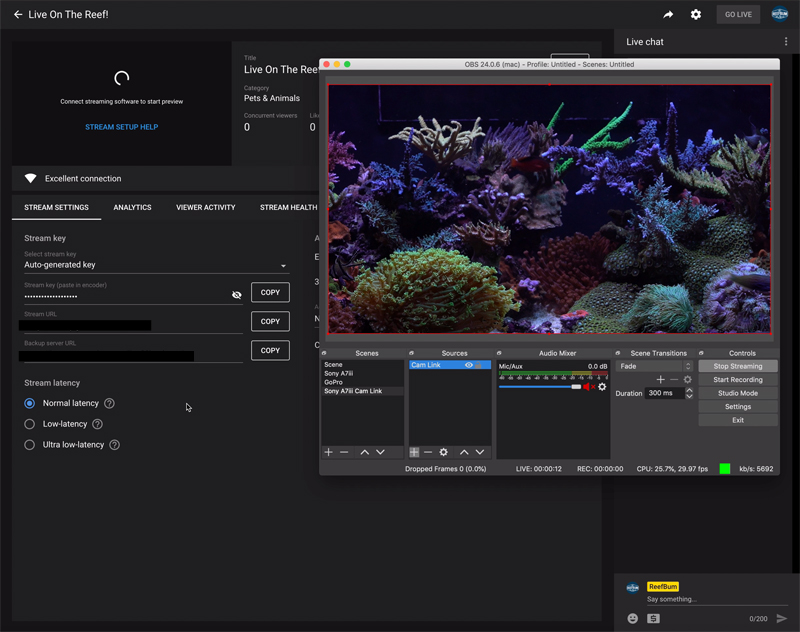
- Click on the “Stream” tab and choose either “Facebook Live” or “YouTube/YouTube Gaming. You will notice there are many other choices such as Twitch so this tutorial can also be used for those platforms. Leave the “Server” field as is.
- Stream key – There are different procedures for retrieving this for both Facebook and YouTube
- Facebook
- Go to your Facebook page.
- Click on “Creator Studio” at the top.
- Select the “Go Live” button in the top right corner.
- Select the page you manage.
- Under “Live API” in the top right corner copy the “Stream Key” and paste it into the “Stream Key” field in OBS.
- YouTube
- Go to your YouTube channel.
- Click on “YouTube Studio” in the upper right hand corner.
- Click on the “Create” button in the top right hand corner and then “Go Live”.
- Select “Stream” at the top and “New Stream”.
- Enter a title, description and any other relevant settings.
- Click on “Create Stream” at the bottom.
- On the left you will see a Stream Key. Copy and paste it into the “Stream Key” field in OBS.
- Facebook
- In the “Output” menu select “Simple” for “Output Mode”.
- Use 5500 as the “Video Bitrate” and 128 for the “Audio Bitrate”
- You can record the stream but I would advise against it since it will chew up processing power on your computer or laptop.
- In the “Audio” menu select 44.1 kHz as the “Sample Rate”.
- Use “Stereo” for “Channels” and choose “Disabled” for both desktop audio options.
- For “Mic/Auxiliary Audio” choose “Built-in Microphone”. Select “Disabled” for the other auxiliary audio options.
- Select “Fast” for “Meters Decay Rate” and “Sample Peak” for “Peak Meter Type”. Use “Default” under “Advanced” for “Monitoring Device”. Leave the “Hotkeys” boxes below un-checked.
- In the “Video” menu select “1280×720” for “Base (Canvas) Resolution” and “Output (Scaled) Resolution”.
- Use “Bicubic (Sharpening scaling, 16 samples)” for the “Downscale Filter”
- Choose “60” for the “Common FPS Values” to match what is used on the camera.
- Leave both the “Hotkeys” and “Advanced” menus as is.
- Click “Ok”.
Final Steps
Before you launch the stream make sure you have some headphones plugged into your laptop or computer so you can monitor the sound. Ok, are we ready? Hit the “Start Streaming” button under “Controls”. If you chose YouTube then you are live once you hit the “Go Live” button in the top right corner of your YouTube page with the stream key. For Facebook enter a title and description for the live stream on the left where the stream key is in the live section of Creator Studio. Hit “Go Live” in the bottom left hand corner and you are in business.
To monitor the stream health observe the “CPU” in the lower right hand corner of OBS. You should be fine if it is under 70% but you may see some buffering if it climbs into the 80% range. If this happens you either don\’t have enough bandwidth or your computer/laptop is not powerful enough for streaming. This is why it is critical to first run the stream on a test account. A buffering, choppy live stream is a terrible user experience and will turn off your followers.
For a more visual tutorial you can view this video:
Additional Resources
If you would like some help with a new tank build, including help designing a custom aquarium, or help re-configuring your current setup then you can visit this page for more information. And if you are looking to add some equipment, I do sell GHL, Pax Bellum, Reef Octopus Calcium and Kalk Reactors and Royal Exclusiv products, including Dreamboxes, which is the equipment I use and recommend. I also sell Reef Brite metal halide and LED fixtures as well as Maxspect & IceCap Gyres.
As for additional insights and information, please explore my many other reef tank and SPS related articles as well as my YouTube channel. For an even deeper dive into reef tank care you can check out my Reef Keeping Master Class. This online course is an immersive and one of a kind educational tool designed to help reef aquarium hobbyists build and maintain a beautiful SPS reef tank. The course is a series of video presentations with some supplemental video from my YouTube channel. There are also quizzes to help students retain and understand the information presented in the course.
Need some frags…..I can help with that as well 🙂 Please visit my SPS Frag store to see what is available.

